How to Create a Purchase Invoice (New Vers.)
Creating a purchase invoice helps to maintain organized and precise records of your transactions.
1. Click on Purchases and select 'Purchase Invoices'

2. Click on Add New

3. Click on Add Supplier
(If you're unsure how to add Supplier, please refer to this link for detailed guidance: How to create a Supplier in Biztory)

4. Enter a purchase invoice number
(A unique identifier assigned to each invoice generated for purchases)

5. Select a purchase invoice date
(Date when the invoice is issued)

6. Add staff member(s)

7. Select an owner

8. Select a project

9. Choose a currency exchange rate (optional)

10. Click on the button to get latest rate (optional)
(Rate used to convert foreign currency to local currency.)

11. Click on Tagging (optional)
(Optional categorization or labeling for organization or reporting purposes.)

12. Type in a tag to create or choose

13. Click on Save

14. Add additional fields (optional)

15. Choose a field name

16. Enter a field value

17. Check if you want to include it when printing

18. Click on Confirm

19. Search for an item code
(It should auto-fill the rest of the information. If it doesn't, please complete the remaining fields.)

20. Select the bar code icon to add a serial number (optional)

21. Enter a serial number

22. Click on add row to add more serial numbers

23. Click on Confirm

24. Click on add item to add more items

25. Click on add bulk to add more than one item at a time

26. Enter the product code or name

27. Choose a category
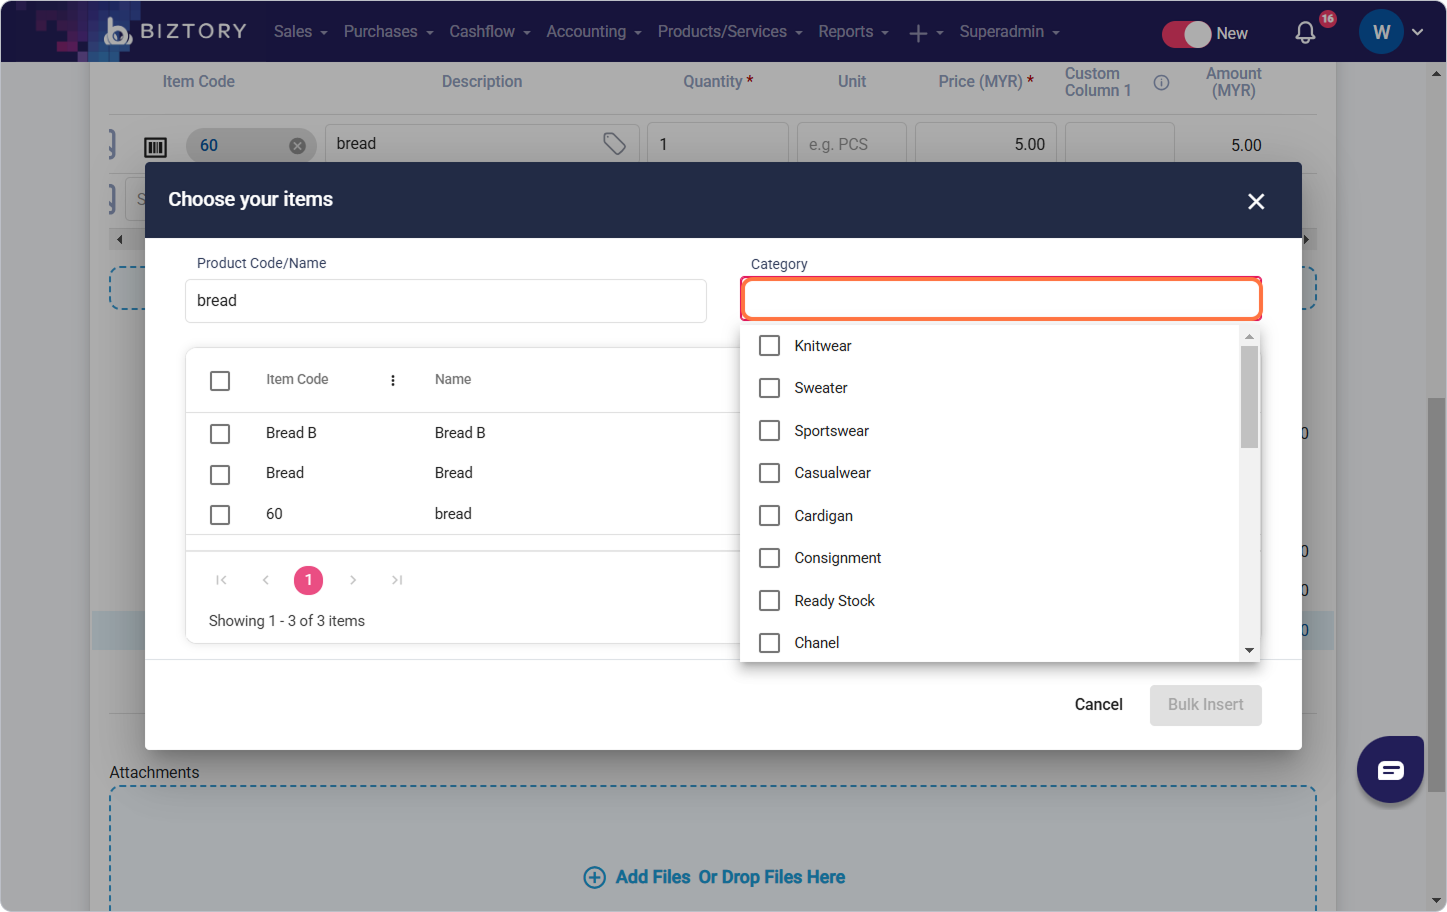
28. Select items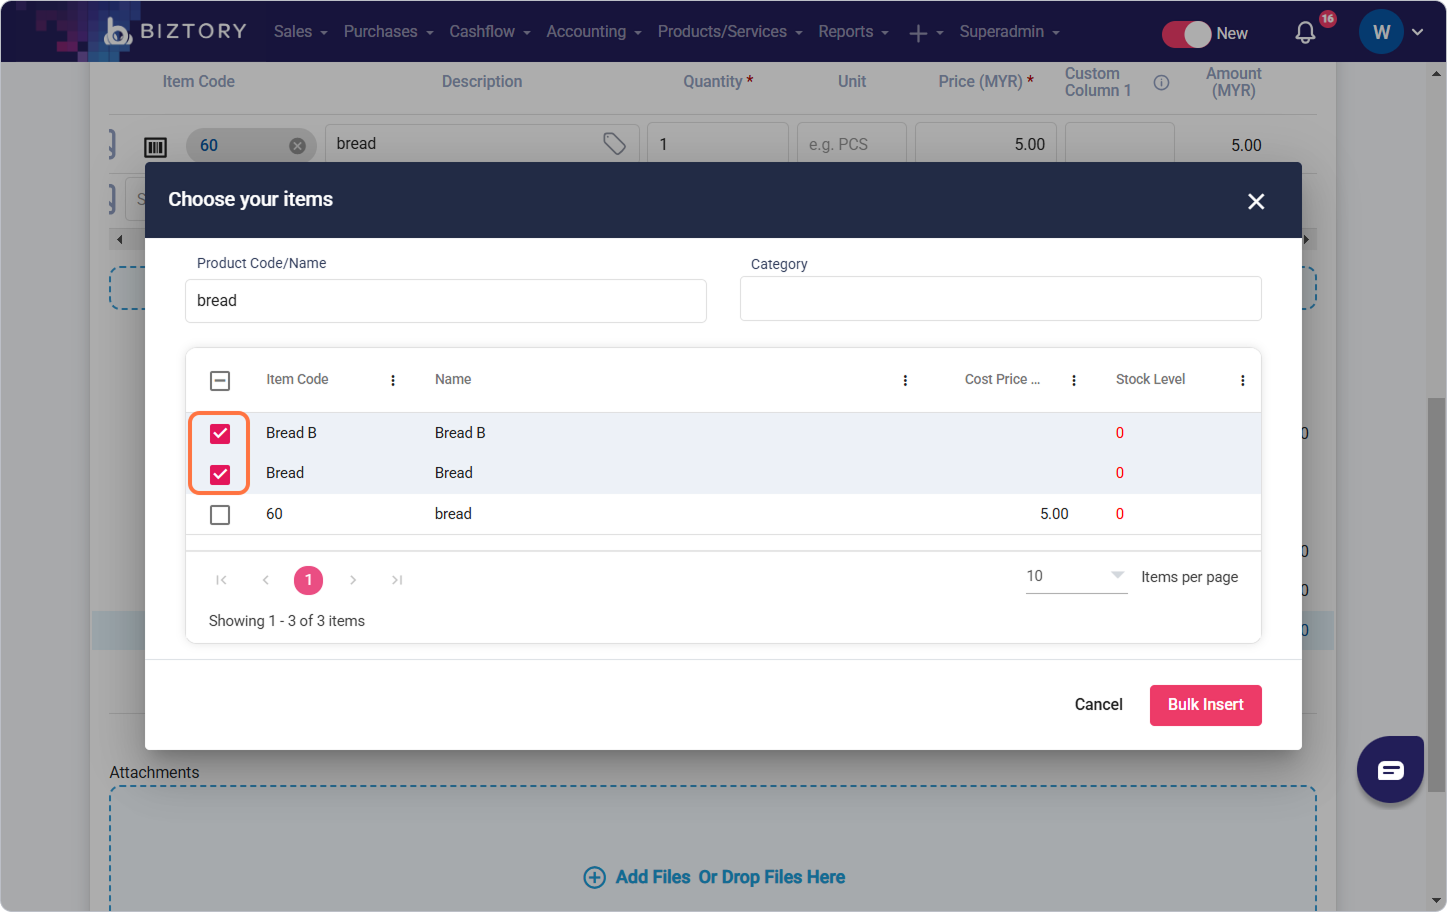
29. Click on Bulk Insert

30. Click on add discount (optional)

31. Choose a discount type

32. Enter a discount amount

33. Click on Confirm

34. Click on add service charge (optional)

35. Choose an additional charge type

36. Select type

37. Enter an amount

38. Enter a description

39. Click on Confirm

40. Add amount paid (optional)

41. Select a payment method

42. Enter an amount

43. Enter a description

44. Click on Confirm

45. Choose to add or drop files (optional)

46. Click on Save

Was this article helpful?
That’s Great!
Thank you for your feedback
Sorry! We couldn't be helpful
Thank you for your feedback
Feedback sent
We appreciate your effort and will try to fix the article